Beastlord Darmac Strategy Guide
Tip: Click map to zoom
Tip: Click map to zoom
Tip: Click map to zoom
Tip: Click map to zoom
Tip: Click map to zoom
Tip: Click map to zoom
Tip: Click map to zoom
Tip: Click map to zoom
Tip: Click map to zoom
Beastlord Darmac is the first boss of the Iron Assembly wing of the Blackrock Foundry raid, and can be found in The Breaking Grounds. Players access Darmac via the second exit on the right side of the Workshop.
This Blackrock Foundry raid strategy guide provides an overview of killing Beastlord Darmac for raid leaders as well as specific tips for tanks, healers, and dps. It also includes information on harmful trash, and screenshots of harmful abilities.
This guide provides an in-depth look at Normal and Heroic difficulties, with summaries of changes in Mythic and Looking for Raid difficulties.
Looking to log a fight and improve your performance? Go to Warcraft Logs for logs, advanced fight analysis, replays, and more!
Table of Contents
Loot and Rewards
This loot overview helps you plan out your Seal of Tempered Fate Bonus Rolls. Check out ourBeastlord Darmac database page to filter loot by difficulty as well as by loot specialization.
LFR (650)
-
-
-
-
-
Neck: none
-
-
-
Trinket: none
-
Weapons: none
|
Normal, Heroic, Mythic (665, 680, 695)
|
 Elemental Rune for the legendary questline can be obtained while on
  Might of the Elemental Lords.
Each Blackrock Foundry boss, as well as Highmaul bosses, has a unique achievement that counts towards  Glory of the Draenor Raider. This rewards
  Gorestrider Gronnling. Beastlord Darmac's special achievement is
  Fain Would Lie Down.
There are achievements for killing each Blackrock Foundry boss, as well as Highmaul bosses, on Mythic difficulty. Killing every boss rewards  Mythic Draenor Raider, which allows you to place a special monument in your Garrison.
Notable Trash Mobs
Since Beastlord Darmac is the first encounter of a wing, players must pass through the trash in the Workshop to get to him. This trash is shared by the first bosses of each wing, and consists of the following enemy types:
Tanks should pull carefully in this room as the AoE damage is very heavy while either an Ogron Hauler or the Iron Slag-Shapers are alive. Try to avoid pulling other packs with the Hauler, and to pull small packs of the remaining enemies. Crowd-control abilities are very useful for this difficult trash.
Two Iron Wardens guard the hallway to the Breaking Grounds. These enemies will deal heavy melee damage with  Whirling Steel, and will periodically stun tanks with
  Shield Slam. When the Wardens use
  Iron Bulwark, tanks should separate the Wardens from one another.
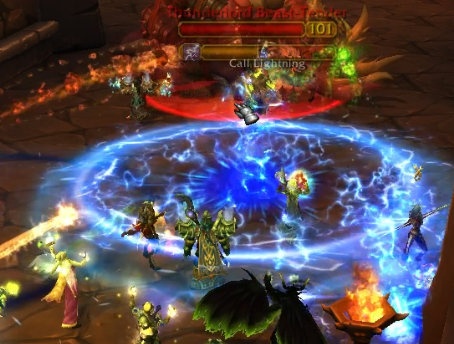
Electrical Storm
Once past the Wardens, players will encounterThunderlord Beast-Tender, who is accompanied by anOrnery Ironhoof and a Stubborn Ironhoof.
- The Ironhooves have a
 Goring Swipe and must be faced away from raid.
- Thunderlord will occasionally buff one of the two Ironhooves with
 Bestial Wrath. This cannot be removed by enrage-dispelling effects, so tanks may need to use CDs.
- Thunderlord will
 Spirit Bond with the Ironhooves, drawing heavy healing, so kill the Ironhooves first.
- Interrupt Thunderlord's
 Call Lightning.
- Move out of the Thunderlord's
 Electrical Storm.
The final pack before Darmac includes Markog Aba'dir, whose main ability is  Colossal Roar. This deals moderate damage to all players and increases Markog's damage dealt, stacking each time he casts. Colossal Roar occurs every 5 seconds, so players should save powerful damage reduction and healing cooldowns for the later Roars where damage will be high.
Beastlord Darmac Tips & Strategy
Tip: Click map to zoom
Tip: Click map to zoom
Tip: Click map to zoom
Tip: Click map to zoom
Tip: Click map to zoom
Tip: Click map to zoom
Tip: Click map to zoom
Tip: Click map to zoom
Tip: Click map to zoom
The Beastlord Darmac encounter is a multi-phase fight, wherein players control the order of the phases by positioning Darmac next to the Prime Beast they wish to activate next. Each Prime Beast has a set of abilities they will use while Darmac is riding them, and after players defeat the Beast, Darmac retains some of their abilities for the remainder of the fight.
- Darmac will choose a Prime Beast to mount at 85%, 65%, and 45% health
- Players must defeat the Beast in order to dismount Darmac and push him to the next Beast phase
- Cruelfang, the Worg, grants Darmac
 Rend and Tear
- Ironcrusher, the Elekk, grants Darmac
 Tantrum
- Dreadwing, the Rylak, grants Darmac
 Superheated Shrapnel
- After defeating all three Prime Beasts, players must contend with a long Darmac phase with all three Beasts' granted abilities
The order listed above is the recommended order for players to activate the Beasts, at least for initial kills. This order minimizes raid damage and introduces the easiest-to-counter abilities first.
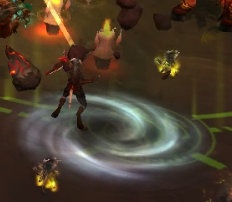
Heavy Spear indicator
Beastlord Darmac begins the encounter with only two abilities:
<ul style="margin: 1em 0px; padding-left:


